The "Problem Update"....
Note from Steve Battisson, the webmaster: My apologies to Cor and all his adoring fans, I have been about two months late on this update due to moving house. I promise not to do it again any time soon!!
Hi all…… This is a “problem” update so please enjoy because I didn’t!
It has been a long time since the last V6 update, but in recent months I have had numerous motorcycle things crossing my path. At first there was my friend Karel who was eager to ride my Sulzbacher Laverda at Spa Francorchamps. That bike had not run for about 30 years and preparing it for use demanded all my attention.
Then there was the fabulous London-to-Breganze tour with four 100cc machines, the preparation for which again required lots of time. In between the times I had a lot of visitors in the museum this year and in September I had a beautiful motorcycle ride with my American friends of 7500 km.
But throughout every day my V6 project was never far from my thoughts!!
In March I dismantled the V6 engine. Everything looked fine but a magnaflux check showed cracks in the crank!! Another V6 crank that I own showed cracks as well !!
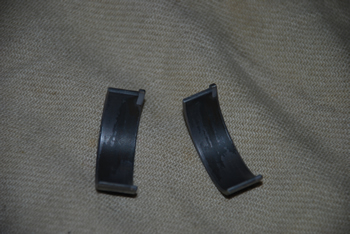
Then I found out the bearing shells were too bad to re-use, the 30 year old oil has probably become aggressive and has affected the surface of the shells. With a world wide research I found out they are not available anymore and new ones can be made, but only in big quantities.
I got perfect help from the ACL company in Australia that sent me their complete bearing shell PDF file of 600 pages!! I took a couple of days to wrestle through this file but finally I found shells that came very close to the original sizes and that had the right material for the high revving V6.
I made the decision to order 2 new cranks in England that will have the same sizes, shapes and weights like the original ones. The only difference will be material and the heat treatment procedure. The original cranks were at that time hard chrome plated on the journals and taps and as can be seen on the attached picture that was not a perfect procedure.
Another problem is the distributor because I have one unit but I need two. I still have very good contact with a retired man of Magneti Marelli and he knows everything about this distributor. He told me that the rotors were prototype ones and were never used in the automotive industry. In future a mould has to be made to injection mould this rotor. Uwe Witt from Germany will help me with the electronics for the ignition system. A test unit is now in his workshop for some testing (see pictures).
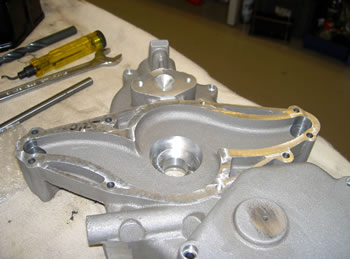
In October I started again with producing parts. The first part that I wanted to manufacture was the fronthousing as they call it. Two beautiful cast pieces that the factory cast for me in 1999. The problem with this piece was that they did not cast the transit channel for the liquid system!! I found this out in 2000 after the take over by Aprilia. Via a “backdoor “operation this channel had to be made.
Will be continued……………
Regards, Cor
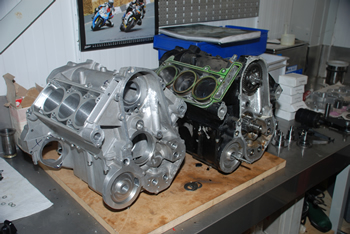
Two brothers together; to the right the black engine is the one from the complete "1991" bike purchased recently, to the left the silver one is that which I bought as a bare casting in 1998.
Small differences can be found. The black engine is the prototype engine that had 30 mm carburators. The heads are a little different and so is the upper part of the crankcase.
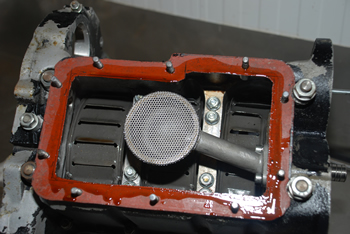
The baffle plates and the dry sump part can be seen.
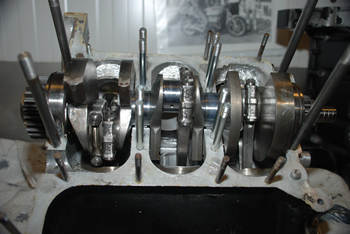
A look into the heart of the Laverda V6.
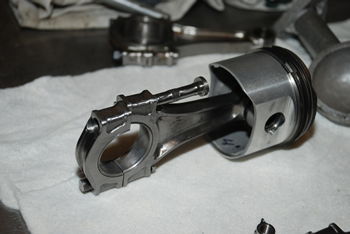
Piston and con rod. Pistons and liners look perfect. Probably the connecting rods will be replaced because of using other bearing shells that have a little different thickness.
The affected surfaces can be clearly seen.
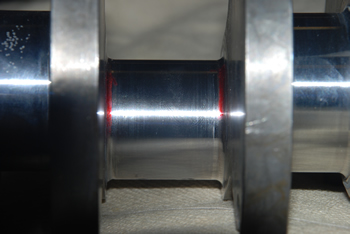
The crank with his remarked places where cracks were found by magnafluxing. On the left journal you still can see the poor hard chrome plating!
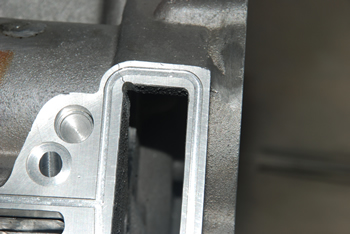
A too sharp corner in the casting caused a crack in the crankcase. On this picture the sharpness has already removed. It will be carefully welded at the time.
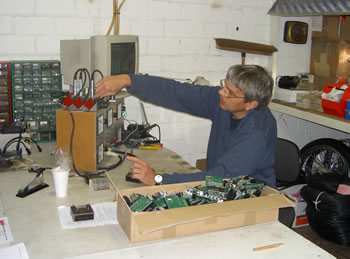
Uwe Witt not working on my V6 project!
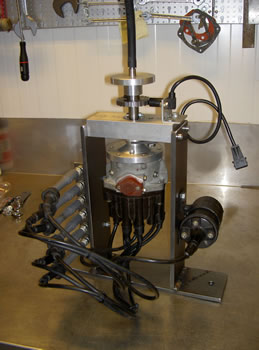
Test Unit made for Uwe to test the new Electronics.
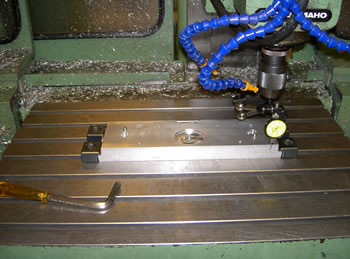
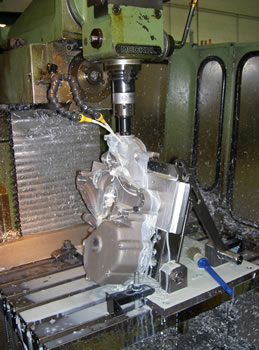
To fix the fronthousing in a precise way, first a very accurate jig had to be made.
To get this sand cast piece in the correct location on the crankcases the latter were set up and
the centre defined. Then the fronthousing was glued onto the crankcases and left there for 24 hours to get the glue harden. Only after that could the machining begin.
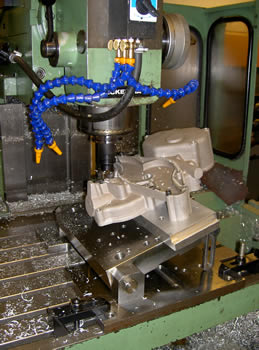
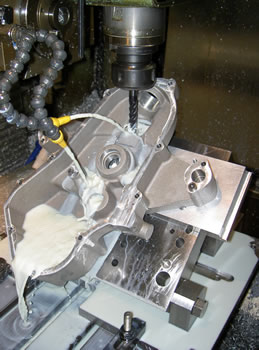
The start of the milling process and making the precise adjusting holes that will fix on the jig.
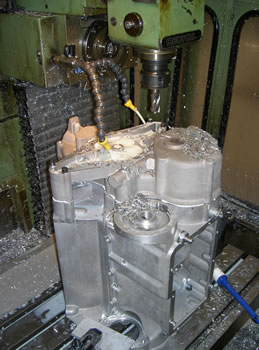
Then the fronthousing can be cut of from the crankcases and machined seperately.
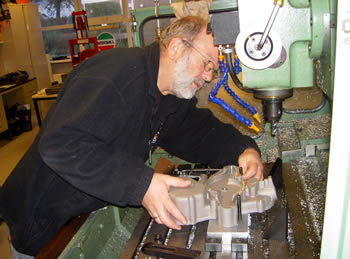
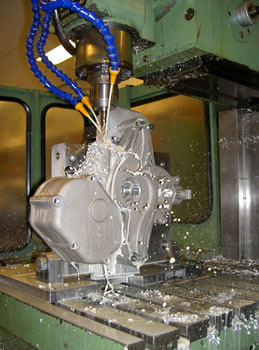
Setting up the fronthousing on the Milling Machine.
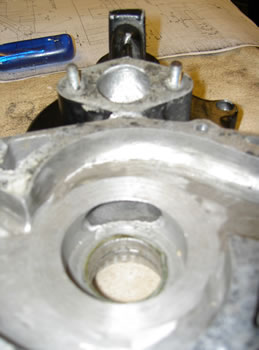
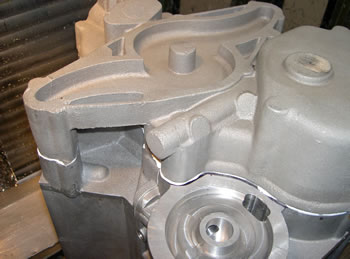
Fronthousing from the 1991 V6 showing the transit channel for water.
Without the channel! The casting for the new-built engine as produced in 1999. You can see in the central bore there is no oval hole for water to pass. All solid material and no warranty for me anymore!!
Boring the hole for the distributor.
From the inside a roughly formed channel is milled and lateron by hand finished. After that job the channel will be closed by a cover and welded.
Boring oil holes.
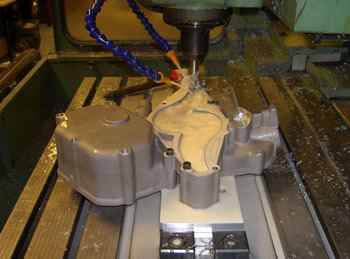
Finishing the waterway.